Introduction
This guide aims to help you start sending your site emails through Amazon SES with WP Offload SES as quickly as possible.
This article covers the following steps:
- Login to the AWS Console
- Create an Amazon Web Services (AWS) User
- Saving the AWS User’s access details for WP Offload SES to use
- Configure WP Offload SES to send emails through Amazon SES
Login to the AWS Console
Already have an Amazon Web Services (AWS) account? Sign in here.
If you don’t have an AWS account yet, you will need to sign up here.
Create an IAM User
Once you have logged into the console, you will need to create a new IAM user:
Navigate to the IAM Users page in the AWS Console, click the Add user button.
Enter a name for the user in the User name field.
Names are case insensitive and must be unique within your AWS account. User names can be a combination of up to 64 letters, digits, and these characters: plus (+), equal (=), comma (,), period (.), at sign (@), and hyphen (-).
Under Access type select the checkbox for Programmatic access, then click the Next: Permissions button.

To allow the new user to verify new senders and send emails via SES, you need to grant it specific permissions.
Click the “Attach existing policies directly” button, and then enter “ses” in the filter policies input box.
Select the “AmazonSesFullAccess” policy, then click the Next: Review button at the bottom of the page.

If everything looks good, click the Create user button.

You will be shown the security credentials for the user, which consists of an Access Key ID and a Secret Access Key. Amazon will not show these again so please download them as a .csv and also copy them somewhere safe. If you lose them, you can always create a new set of keys from the console but you cannot retrieve the secret key again later.

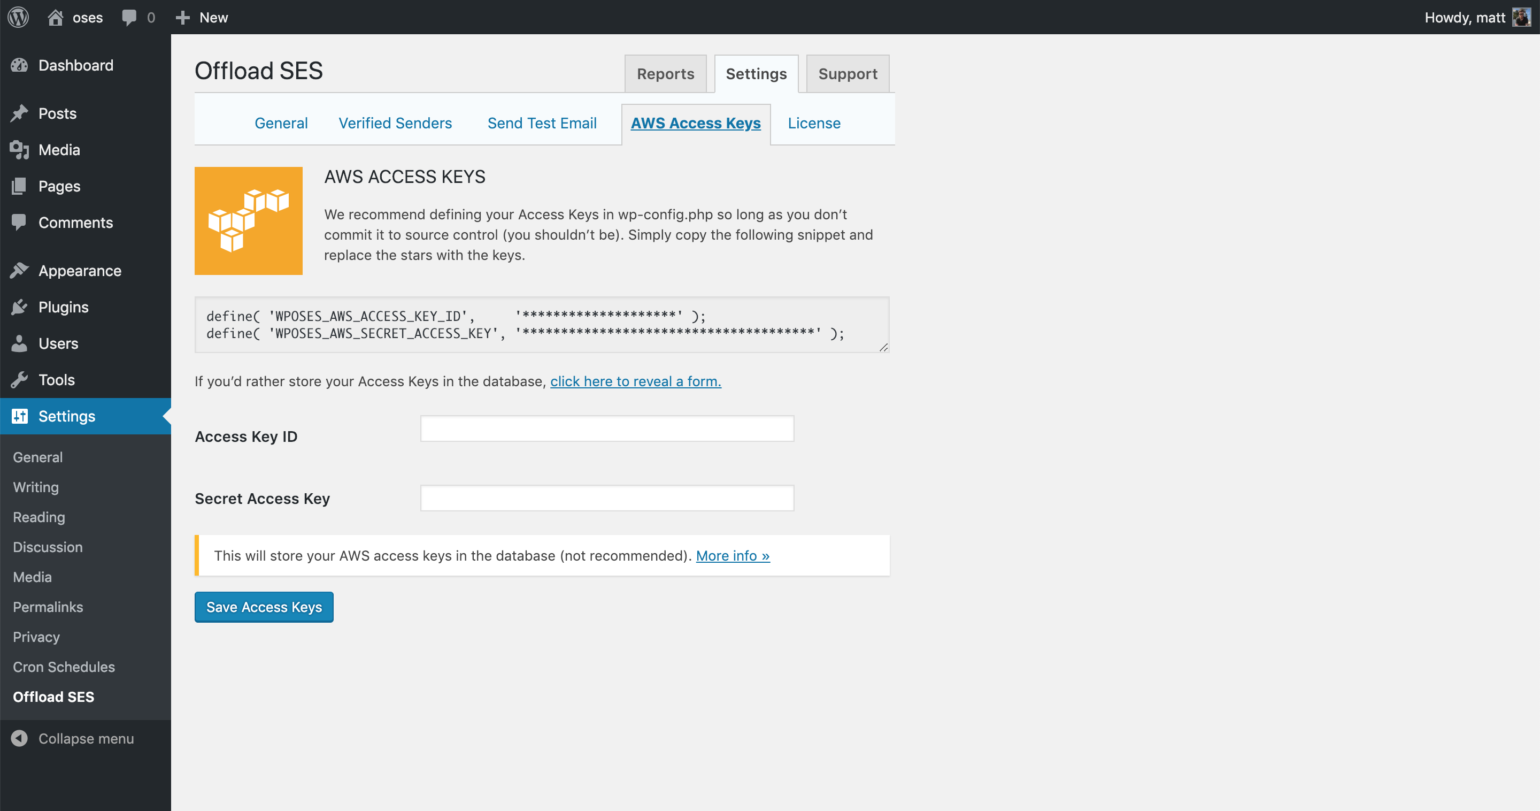
Define Your Access Keys
Now that you have your AWS Access Keys, you need to add them to your site so that WP Offload SES can use them to work with Amazon SES.
For better security, we recommend defining your access keys in your wp-config.php:
define( 'WPOSES_AWS_ACCESS_KEY_ID',     '********************' );
define( 'WPOSES_AWS_SECRET_ACCESS_KEY', '**************************************' );
These should be placed before the following block of code in your wp-config.php:
/* That's all, stop editing! Happy blogging. */

/** Absolute path to the WordPress directory. */
if ( !defined('ABSPATH') )
    define('ABSPATH', dirname(__FILE__) . '/');

/** Sets up WordPress vars and included files. */
require_once(ABSPATH . 'wp-settings.php');
Warning: If you define your access keys after this block of code, WP Offload SES will not be able to read them.
Alternatively, you can enter your access keys into the form on the AWS Access Keys page inside WP Offload SES. This will save them to the database, which is less secure than defining them in your wp-config.php.
If you’re running your site on an Amazon EC2 instance, you might like to use an IAM Role instead. This is even more secure than defining your access keys in wp-config.php.
Make Sure Cron Is Set Up
We highly recommend that you configure a proper cron job on your server as WP Offload SES relies heavily on background processing. See our Cron Setup doc for details on how to accomplish this.
Configure WP Offload SES to send emails through Amazon SES
If you haven’t installed WP Offload SES before, visit the WP Offload SES settings page to launch the Setup Guide. This will have everything you need to get started using WP Offload SES:
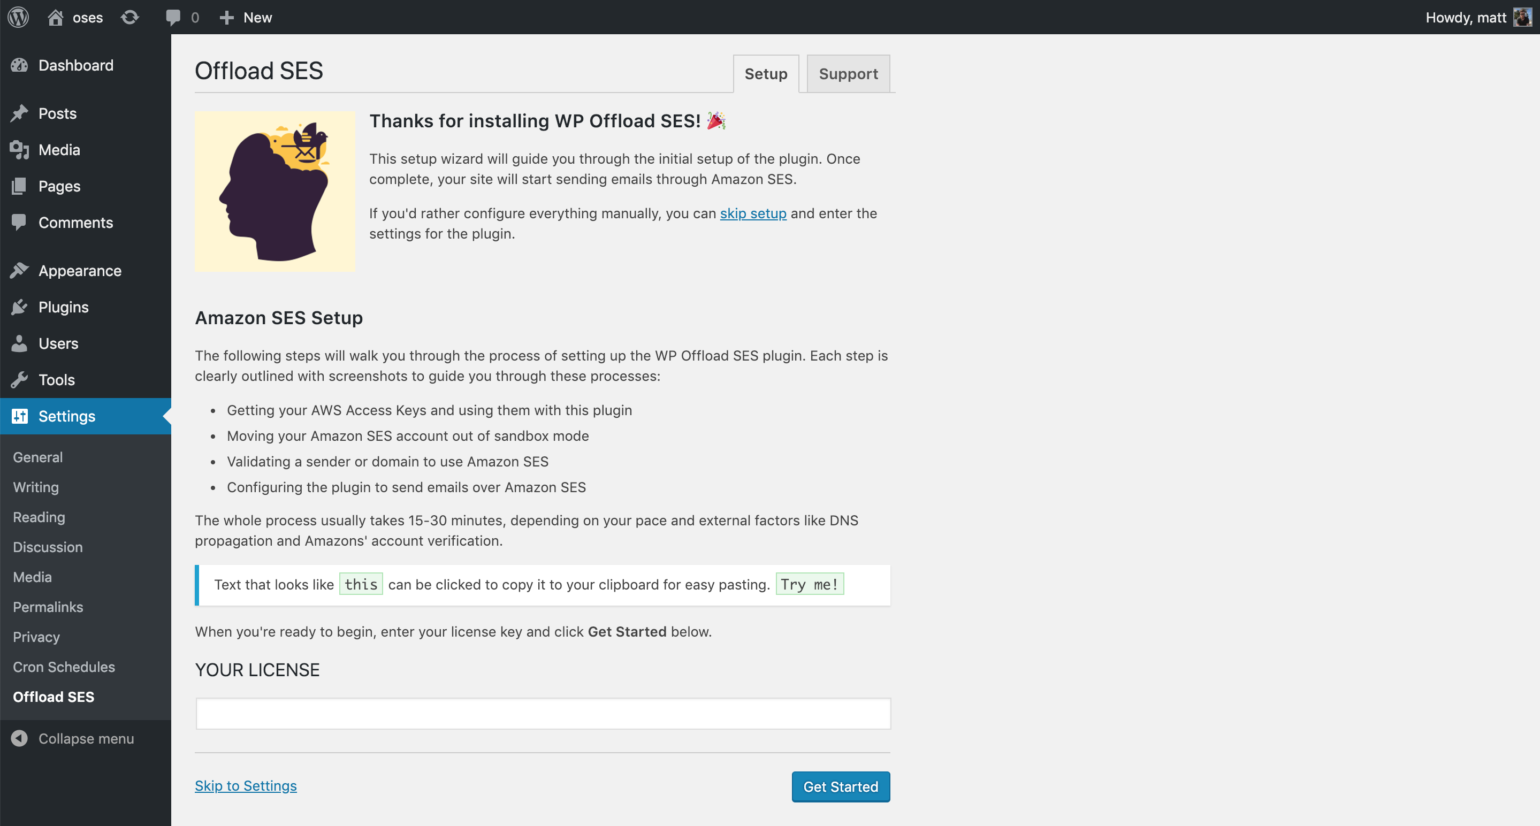
Alternatively, you can click “Skip to Settings” and configure the plugin manually.
The post Quick Start Guide appeared first on Delicious Brains.


